Temporary tattoos offer a fun, commitment-free way to experiment with body art. Whether you’re testing a design before getting permanent ink, adding flair for a special event, or just trying something new, learning how to apply a temporary tattoo correctly ensures it looks realistic and lasts as long as possible.
This complete guide will walk you through the entire process, from preparation to removal, with expert tips to make your temporary tattoo look professional and stay vibrant for days.
How to Apply a Temporary Tattoo: What You’ll Need
Before you begin, gather these simple supplies:
- Your temporary tattoo
- Clean cloth, sponge, or paper towel
- Room temperature or warm water
- Scissors
- Paper towel for drying
- Baby powder or translucent setting powder (optional)
- Rubbing alcohol or oil-free cleanser
Most temporary tattoos use a water-transfer method, which we’ll focus on in this guide. The entire application process takes less than five minutes from start to finish.
Preparing Your Skin for Application
Proper skin preparation is the most important step for how to apply a temporary tattoo that actually lasts. Skip this step, and your tattoo may peel or fade within hours.
Clean the Area Thoroughly
Wash the application area with soap and water to remove all dirt, oils, lotions, and sweat. These substances prevent the tattoo from adhering properly to your skin. For best results, use an oil-free cleanser or wipe the area with rubbing alcohol on a cotton pad.
Just as you would properly care for your skin in your daily routine, taking the time to prep your skin ensures better adhesion and longer-lasting results.
Dry Completely
Pat the area completely dry with a clean towel. Any moisture on your skin before application can cause the tattoo to smudge or transfer unevenly.
Consider Hair Removal
For the smoothest application and longest wear, consider shaving the area if it has noticeable hair. Hair prevents the tattoo from making full contact with your skin and causes it to wear off faster. Shave at least a few hours before application to avoid irritation.
If you’re considering a Brazilian wax or other hair removal method, plan ahead and allow your skin time to recover before applying your temporary tattoo.
Choose the Right Placement
Select a smooth, flat area of skin for best results. The best locations for temporary tattoos include:
- Inner forearm – minimal friction, easy to show off
- Upper arm – long-lasting placement
- Shoulder blade – stays protected from rubbing
- Ankle – cute and visible
- Wrist – perfect for smaller designs
Avoid areas that experience heavy friction like fingers, elbows, knees, and the soles of feet. These spots cause tattoos to fade within a day or two.
How to Apply a Temporary Tattoo: Step-by-Step Instructions
Now you’re ready to learn how to put on a temporary tattoo like a pro. Follow these steps carefully for perfect results.
Step 1: Cut Out Your Design
Using scissors, carefully cut around the tattoo design, leaving a small border. You don’t need to cut precisely along the edges—just make sure you don’t cut into the actual design.
For extra-large tattoos, consider cutting the design into smaller sections. This makes application easier and helps you avoid bubbles or wrinkles.
Step 2: Remove the Protective Film
Peel off the clear protective sheet covering the tattoo. This is the top layer that protects the design during storage. Underneath, you’ll see the printed design on the transfer paper.
Step 3: Position the Tattoo
Place the tattoo face-down on your clean, dry skin exactly where you want it. The design side should be touching your skin, with the paper backing facing up.
Take a moment to position it correctly—once you start the transfer process, you won’t be able to reposition it.
Step 4: Apply Water
Dampen your cloth, sponge, or paper towel with room temperature or warm water. Don’t use cold water, as it doesn’t activate the transfer as effectively.
Press the wet cloth firmly against the back of the tattoo paper, covering the entire design. Make sure the paper is thoroughly saturated—this is what releases the tattoo from the paper onto your skin.
Step 5: Hold and Press
Hold the wet cloth in place for 30-40 seconds, applying even pressure across the entire tattoo. This is the critical step in how to apply a temporary tattoo successfully.
For larger designs, you may need to hold for up to 60 seconds to ensure complete transfer. Don’t rush this step—it’s better to wait a bit longer than to end up with an incomplete transfer.
Step 6: Peel Away the Paper
Carefully peel back one corner of the tattoo paper to check if the design has fully transferred to your skin. If it looks complete, slowly peel away the rest of the backing paper.
If parts of the design are still on the paper, lay it back down, apply more water, and press for another 10-15 seconds before trying again.
Step 7: Let It Dry
Allow your new temporary tattoo to air dry completely for at least 2-3 minutes. Don’t touch, rub, or cover it during this time. The tattoo needs to set properly on your skin.
Gently pat away any excess water with a paper towel—don’t rub or wipe, as this can smudge the fresh design.
How to Make Your Temporary Tattoo Last Longer
Once you’ve mastered how to apply a temporary tattoo, use these tips to extend its lifespan from a few days to a full week or more:
Apply Setting Powder
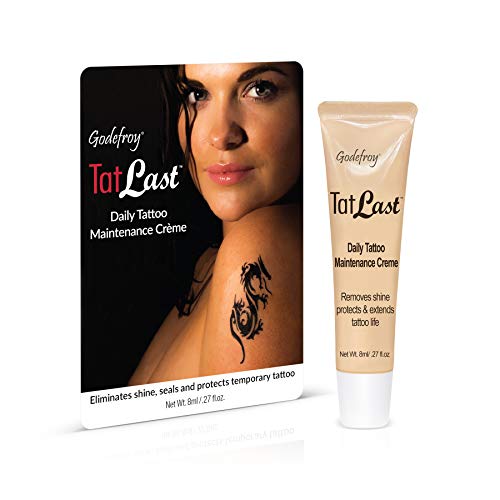
Once the tattoo is completely dry, lightly dust it with baby powder or translucent setting powder. This absorbs excess moisture and oils, creating a matte finish that looks more realistic and lasts longer.
Use a Sealant
For maximum longevity, apply a thin layer of liquid bandage spray, hairspray, or setting spray designed for temporary tattoos. This creates a protective barrier against water and friction.
Keep It Dry
Water is your temporary tattoo’s biggest enemy. Keep showers short and avoid scrubbing the tattooed area. Pat it dry gently after bathing—never rub. If you plan to swim, apply a waterproof sealant beforehand.
Avoid Friction
Wear loose clothing over your tattoo, especially for the first 24 hours. Tight fabrics that constantly rub against the design will cause it to fade faster.
Moisturize Around (Not On) the Tattoo
Keep the surrounding skin hydrated to prevent peeling, but don’t apply lotion directly on the tattoo itself. Oils and lotions break down the adhesive and cause premature fading. Consider using a quality moisturizer for your skin type on the areas around your tattoo.
Skip Exfoliation
Avoid exfoliating, scrubbing, or using harsh soaps on the tattooed area. These activities remove the top layer of skin along with your tattoo. If you typically use exfoliating products, apply them away from your temporary tattoo.
Common Mistakes to Avoid
Even when you know how to apply a temporary tattoo, these common mistakes can ruin your results:
Applying to oily or dirty skin – Always clean and dry the area first. This is the #1 reason temporary tattoos fail.
Not saturating the paper enough – The backing paper must be completely wet for proper transfer. When in doubt, add more water.
Removing the paper too soon – Patience pays off. Wait the full 30-40 seconds before checking.
Rubbing the fresh tattoo – Let it air dry naturally. Any rubbing or touching can smudge the design.
Applying lotion beforehand – Never moisturize the skin right before application. Oils prevent adhesion.
Choosing high-friction areas – Avoid joints, hands, and feet if you want your tattoo to last.
Temporary Tattoos vs. Permanent Tattoos
If you’re using temporary tattoos to test a design before committing to permanent ink, you’ll want to understand the key differences. Unlike permanent tattoos that require specific aftercare and healing time, temporary tattoos are ready to show off immediately.
Temporary tattoos are perfect for special events, festivals, or simply expressing your creativity without the lifetime commitment. They’re also ideal if you want to experiment with placement and style before visiting a tattoo artist.
How to Remove a Temporary Tattoo
When you’re ready for a change, here’s how to remove your temporary tattoo safely:
Baby Oil Method
Apply baby oil generously to the tattoo. Let it sit for 30-60 seconds to break down the adhesive, then gently wipe away with a cotton pad. This is the gentlest removal method for sensitive skin.
Rubbing Alcohol Method
Soak a cotton ball in rubbing alcohol and hold it against the tattoo for 10 seconds. Gently rub until the design lifts away. This method works faster but can be drying.
Tape Method
Press a piece of transparent tape firmly over the tattoo, then peel it off quickly. Repeat several times until the design is gone. This works best for fresh tattoos.
Soap and Scrub Method
Wet the tattoo and apply soap. Use a washcloth to scrub the area in circular motions. This takes more effort but uses supplies you already have.
After removal, wash the area with soap and water, then apply moisturizer to soothe the skin.
Temporary Tattoo Care Tips for Active Lifestyles
If you lead an active lifestyle, you’ll want to take extra precautions to keep your temporary tattoo looking fresh:
- Before workouts: Apply setting powder to absorb sweat
- During exercise: Wear moisture-wicking clothing that doesn’t rub against the tattoo
- After exercise: Pat the area dry gently rather than wiping vigorously
- For swimming: Use waterproof sealant spray before entering the pool or ocean
Frequently Asked Questions
How long do temporary tattoos last? Most temporary tattoos last 3-7 days with proper application and care. Placement, skin type, and aftercare habits all affect longevity. Tattoos on areas with minimal friction can last up to 2 weeks.
Can I apply a temporary tattoo to my face? Yes, but only use temporary tattoos specifically labeled as safe for facial use and hypoallergenic. Always do a patch test first to check for sensitivity.
Are temporary tattoos safe for kids? Temporary tattoos are generally safe for children when you choose non-toxic, FDA-approved products. Always supervise application and remove immediately if any irritation occurs.
Can I shower with a temporary tattoo? Yes, but keep showers short and avoid direct water pressure on the tattoo. Pat dry gently afterward. Your first shower after application is the most critical—wait at least 6-8 hours if possible.
Why isn’t my temporary tattoo sticking? The most common reasons are oily skin, hair in the application area, not enough water during application, or removing the backing paper too quickly. Clean the skin thoroughly and try again.
Can I reposition a temporary tattoo once applied? No, once the transfer process begins, you cannot reposition the tattoo. Take care to place it correctly before applying water.
Do temporary tattoos work on dark skin? Yes! Temporary tattoos work on all skin tones. For the best visibility on darker skin, choose designs with bold colors and high contrast.
Can I apply sunscreen over my temporary tattoo? Yes, you can apply sunscreen over your temporary tattoo once it’s completely dry and set. This can actually help protect the design from fading in the sun.
Skin Care Considerations
If you have sensitive skin or existing skin conditions, take extra precautions when applying temporary tattoos. Those with mature skin may want to test on a small area first, especially if you already use anti-aging skincare products that could affect adhesion.
For those dealing with specific skin concerns like age spots or sun damage, consult with a dermatologist before applying temporary tattoos to affected areas.
Final Tips for Perfect Temporary Tattoo Application
Now that you know how to apply a temporary tattoo like a professional, keep these final tips in mind:
- Practice on less visible areas first if you’re nervous about placement
- Take a photo immediately after application to document your perfect work
- Allow 1-2 hours for the tattoo to fully set before any physical activity
- Read any specific instructions that come with your particular tattoo brand
- Store unused temporary tattoos in a cool, dry place away from direct sunlight
Temporary tattoos are perfect for testing designs before committing to permanent ink, adding festive flair to parties and events, or simply expressing your creativity without long-term commitment. With the right technique, your temporary tattoo will look realistic and stay vibrant for days.
Whether you’re preparing for a music festival, trying out a design before heading to a tattoo artist, or just having fun with body art, these tips will help you achieve professional-looking results every time.
About the Author

Claudia Faucher is a fitness and lifestyle blogger who shares practical tips for women over 50 on staying active, stylish, and confident. As the creator of FitFab50.com and Beyond59.com, she covers topics like workout gear, beauty trends, and wellness routines. Claudia is passionate about helping others live their best life at any age.
Last update on 2026-02-22 / Affiliate links / Images from Amazon Product Advertising API


