
A simple, empowering guide to taking control of your skincare ingredients
I’ll never forget the day I stood in the skincare aisle, reading the ingredient list on a $90 vitamin C serum. There were at least thirty ingredients I couldn’t pronounce. I thought, “I have no idea what half of these things are or what they’re doing to my skin.” I’d already tried several anti-aging serums that promised miracles, and I was tired of the mystery ingredient lists.

That moment changed everything. I went home and started researching. Could I make something simpler? Something where I actually knew what I was putting on my face?
If you’ve ever felt that same frustration—wanting the benefits of vitamin C for your skin but not loving the mystery ingredients or the price tag—this article is for you. I’m going to show you exactly how to make vitamin C serum at home for beginners, step by simple step.
Important note: Please check with your doctor or dermatologist before trying any new skincare routine, especially if you have sensitive skin, existing skin conditions, or are using prescription skincare products. What I’m sharing here is based on my research and personal experience, but everyone’s skin is different. For a complete approach to skincare after 50, you might want to check out my fall skincare routine guide.
How to Make Vitamin C Serum at Home for Beginners – Why DYI
Why Women Over 50 Are Making Their Own Vitamin C Serum
I’ve talked to dozens of women in our community who’ve started making their own vitamin C serum. Their reasons might sound familiar:
- Control over ingredients: You know exactly what’s going on your skin
- Budget-friendly: A homemade vitamin C face serum costs about $5 to make versus $50-100 for store-bought
- Freshness: You make small batches, so it’s always fresh
- Simplicity: No long ingredient lists or chemical names you can’t pronounce
- Customization: You can adjust the recipe to your skin’s needs

One woman in my email group, Sharon, told me: “I spent decades buying whatever the department store told me to buy. Now I feel like I’m finally in charge of my own skin.”
That empowerment matters.
How to Make Vitamin C Serum at Home for Beginners – What It Does
What Does Vitamin C Actually Do for Your Skin?
Before we dive into the recipe, let’s talk about why vitamin C serum is so popular in the first place. Understanding this helps you decide if it’s right for you.
Vitamin C (also called L-ascorbic acid when we’re talking about the pure powder form) is a powerful antioxidant. Here’s what research shows it may help with:
- Brightening your skin tone and reducing the appearance of dark spots
- Supporting collagen production, which gives skin its firmness
- Protecting against environmental damage from sun exposure and pollution
- Evening out skin texture and reducing the appearance of pores
- Helping skin look more radiant overall
Notice I said “may help with” and “reducing the appearance of.” That’s intentional. Vitamin C serum isn’t magic. It won’t erase decades of sun damage overnight or turn back time.
But many women do notice their skin looks brighter and more even after using it consistently for several weeks. That was my experience too.
Is DIY Vitamin C Serum Right for You?
Here’s what I wish someone had told me before I made my first batch: DIY vitamin C serum isn’t for everyone, and that’s okay.

DIY might be great if you:
- Want to know exactly what’s in your skincare
- Enjoy the creative process of making things yourself
- Don’t mind storing it in the fridge and making fresh batches every week or two
- Want to try vitamin C without spending $50-100 on a commercial product first
- Have relatively non-sensitive skin
You might prefer store-bought if you:
- Have very sensitive or reactive skin (commercial formulas are tested more extensively)
- Want something shelf-stable that lasts months
- Prefer the convenience of grab-and-go products
- Need specific formulations for severe skin concerns (like my guide to best niacinamide serums for aging skin)
- Want guaranteed consistency and stability
There’s no wrong choice here. I’ve done both, depending on what’s going on in my life.
What You’ll Need: Simple Ingredients Explained
One thing that frustrated me about other recipes was they’d list ingredients without explaining why they mattered. So let’s fix that.
Essential Ingredients
Vitamin C Powder (L-Ascorbic Acid)
- What it is: Pure vitamin C in powder form
- What it does: This is your active ingredient that provides the brightening and antioxidant benefits
- Amount needed: ½ teaspoon for a beginner-strength serum
- Where to get it: Health food stores or online (look for L-ascorbic acid powder)
- Important: This is acidic, which is why we start with a lower concentration
Distilled Water
- What it is: Water with impurities removed
- What it does: Dissolves the vitamin C powder and forms the base of your serum
- Amount needed: 2 tablespoons
- Where to get it: Grocery store or pharmacy
- Important: Don’t use tap water—impurities can affect the serum’s stability
Helpful Optional Ingredients
- What it is: A natural humectant (moisture magnet)
- What it does: Helps your skin hold onto moisture and makes the serum feel less watery
- Amount needed: ½ tablespoon (if using, reduce water to 1½ tablespoons)
- Note: This can make the serum last slightly longer
- What it is: Another antioxidant
- What it does: Works alongside vitamin C for extra skin protection
- Amount needed: 2-3 drops
- Note: This is optional but nice to have
- What it is: Pure aloe gel (not the green kind with added ingredients)
- What it does: Soothes and hydrates skin
- Amount needed: 1 teaspoon
- Note: Good for sensitive skin types
Tools You’ll Need
- Small glass bowl (not metal—metal can react with vitamin C)
- Wooden or plastic spoon for stirring
- Dark glass bottle with dropper (amber or cobalt blue, 1 oz size)
- Small funnel (makes pouring easier)
- Measuring spoons
Why dark glass matters: Light breaks down vitamin C quickly. A dark bottle protects it so it stays effective longer.
Your Step-by-Step Recipe (Beginner-Friendly)
This recipe makes about 2 tablespoons of serum—enough for 2 weeks of daily use. I recommend starting with small batches so you can see how your skin responds.
The Basic Recipe (5-10% Vitamin C Concentration)
Ingredients:
- ½ teaspoon vitamin C powder (L-ascorbic acid)
- 2 tablespoons distilled water
OR for a more moisturizing version:
- ½ teaspoon vitamin C powder
- 1½ tablespoons distilled water
- ½ tablespoon vegetable glycerin
- 2-3 drops vitamin E oil (optional)
Instructions
Step 1: Prepare Your Space
- Wash your hands thoroughly
- Clean your glass bowl and tools with hot water
- Gather all ingredients before you start
Step 2: Mix Water and Glycerin (If Using)
- Pour your distilled water into the glass bowl
- If using glycerin, add it to the water and stir until combined
- Glycerin is thick, so this takes a minute
Step 3: Add Vitamin C Powder Slowly
- Sprinkle the vitamin C powder into your water mixture
- Stir gently but constantly
- This will take 2-3 minutes—be patient
- Keep stirring until the liquid is clear with no grainy bits
Tip: If you see little particles floating, keep stirring. They should dissolve completely. If they don’t after 5 minutes, the water might not be warm enough. You can gently warm the mixture (not hot, just lukewarm).
Step 4: Add Vitamin E (If Using)
- Once the vitamin C is fully dissolved, add your vitamin E drops
- Stir gently for another 30 seconds
Step 5: Transfer to Your Bottle
- Use your funnel to pour the serum into your dark glass bottle
- Seal it tightly
- Write today’s date on a label and stick it on the bottle
Step 6: Store Properly
- Put it in the refrigerator immediately
- Keep it there—not in your bathroom cabinet
That’s it. You just made your first homemade vitamin C serum.
How to Use Your DIY Vitamin C Serum Safely
Making it is the easy part. Using it correctly matters just as much.
Before Your First Application: Patch Test
This is not optional. I learned this the hard way.
- Apply a small amount of serum to the inside of your wrist or behind your ear
- Wait 24 hours
- Check for any redness, itching, burning, or irritation
- If your skin looks fine, it’s probably safe to use on your face
- If you see any reaction, dilute the serum with more water or skip it entirely
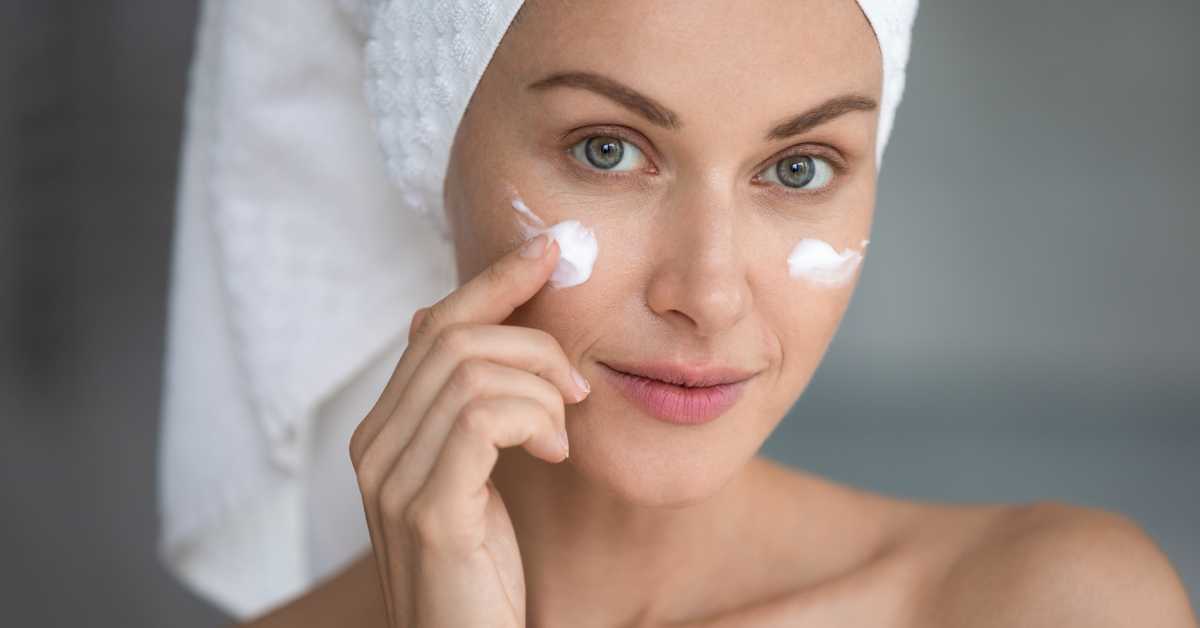
How to Apply It
When: Most people use vitamin C serum in the morning, but evening works too. I prefer morning because vitamin C can help protect against daytime environmental damage.
Amount: 3-4 drops is plenty for your whole face and neck. More isn’t better.
Process:
- Cleanse your face as usual (I recommend a gentle face wash for sensitive skin)
- Pat dry, but leave skin slightly damp
- Apply 3-4 drops of serum to your fingertips
- Gently pat (don’t rub) onto face and neck
- Wait 1-2 minutes for it to absorb
- Apply your regular moisturizer
- Always finish with sunscreen if you’re using it in the morning
Important: Vitamin C can make your skin more sensitive to sun. Sunscreen isn’t optional when you’re using any vitamin C product.
How Often to Use It
Week 1-2: Every other day, just to see how your skin responds Week 3+: Daily if your skin tolerates it well
Some tingling is normal for the first few uses. Burning or persistent redness is not. If you experience the latter, you might need to dilute your serum more.
Storage and Shelf Life
- Where: In the refrigerator, always
- How long: 1-2 weeks maximum
- Signs it’s gone bad: Color changes from clear to yellow, orange, or brown; develops an off smell; looks cloudy
When it starts turning color, it’s oxidized. That means the vitamin C has broken down and lost its effectiveness. Toss it and make a fresh batch.
This short shelf life is the biggest difference between DIY and commercial serums. Store-bought versions have preservatives and special formulations to last 6-12 months. Yours doesn’t, and that’s okay.

Troubleshooting: What If…
My serum stings or burns
- It might be too strong for your skin
- Try diluting it with more water (add another tablespoon)
- Or reduce the vitamin C to ¼ teaspoon next time
- Some people’s skin just doesn’t tolerate L-ascorbic acid well
I see no results after 2 weeks
- That’s actually normal
- Most people need 4-6 weeks of consistent use to notice changes
- Vitamin C works gradually, not overnight
My serum turned yellow after 3 days
- This sometimes happens if there’s any light exposure or if the fridge isn’t cold enough
- Make smaller batches (use 1 tablespoon water instead of 2)
- Make sure you’re using a truly dark bottle
- Check that your fridge is set to 35-40°F
It feels too watery
- Add more glycerin next time (up to 1 tablespoon)
- Or add ½ teaspoon of aloe vera gel
- Some people prefer a thinner serum—it’s a personal preference
My skin got worse (more breakouts)
- This occasionally happens as skin adjusts
- If it continues past 2 weeks, your skin might not like one of the ingredients
- Try the most basic version: just vitamin C and water
- If problems persist, stop using it
What to Realistically Expect
I want to be honest with you because I hate when articles make big promises.
You Might Notice:
- Slightly brighter, more even-looking skin tone after 4-6 weeks
- A subtle glow or radiance
- Dark spots looking less noticeable over time (this takes months, not weeks)
- Smoother skin texture
You Probably Won’t See:
- Deep wrinkles disappearing
- Dramatic overnight changes
- Results identical to professional treatments
- Sagging skin becoming firm again
My experience? After about 6 weeks of consistent use, I noticed my skin looked less dull. My dark spots (I have some from years of sun damage) faded slightly. It wasn’t dramatic, but it was noticeable enough that I kept making it. And for overall skin health, I also focus on moisturizing my body with quality lotions for aging skin.
The results are subtle. Think of it as one helpful piece of your skincare routine, not a magic solution.
Other Ways to Make Vitamin C Serum at Home
Once you’re comfortable with the basic recipe, you can experiment. Here are variations I’ve tried:
With Rose Water
Replace distilled water with alcohol-free rose water for a lovely scent and extra soothing properties. This pairs beautifully with exfoliating toners in your routine.
With Hyaluronic Acid
Add ¼ teaspoon of hyaluronic acid powder to boost moisture retention. (This is more advanced.)
With Orange Peel (Natural Vitamin C)
Some people make vitamin C serum from orange peel, but honestly? It’s much less effective than using pure L-ascorbic acid powder. The vitamin C concentration is unpredictable, and it doesn’t penetrate skin as well. If you want to try it for fun, go ahead, but manage your expectations.
Vitamin C Powder for Face
You can also mix a tiny pinch of vitamin C powder directly into your regular moisturizer right before applying. This gives you fresh vitamin C without making a whole serum. If you’re interested in other affordable, straightforward skincare options, check out my guide to The Ordinary products for mature skin.
When Store-Bought Might Be Better
Remember what I said about empowerment? Part of that is knowing when DIY isn’t the best choice.
Consider buying a commercial vitamin C serum if:
- You have very sensitive skin and need a dermatologist-tested formula
- You’re dealing with significant hyperpigmentation or sun damage and need a more stable, higher-concentration product
- You travel frequently and can’t keep your serum refrigerated
- You forget to make fresh batches regularly
- You have existing skin conditions like rosacea, eczema, or active acne
There are excellent affordable anti-aging creams and vitamin C serums on the market with stabilized forms of vitamin C that are gentler and last longer. That’s not a failure—it’s just choosing what works for your life.
I’ve gone through phases of making my own and phases of buying it. Both are valid choices.
Your Vitamin C Serum Questions Answered
Can I use vitamin C tablets instead of powder? Technically yes, but it’s much harder to get them to dissolve completely, and you can’t control the concentration as precisely. Powder works better.
Will this work as well as expensive serums? The active ingredient (L-ascorbic acid) is the same. But expensive serums often have additional ingredients, stabilizers, and more extensive testing. DIY works, but it’s not identical to commercial products.
Can I add essential oils? You can, but be very cautious. Some essential oils can irritate skin, especially when combined with the acidity of vitamin C. If you want to try it, add just 1 drop of a gentle oil like lavender, and patch test thoroughly.
Why does mine smell funny? Pure vitamin C has a slightly metallic or acidic smell—that’s normal. If it smells truly bad or rotten, it’s gone bad and you should toss it.
Can I freeze it to make it last longer? I wouldn’t recommend it. Freezing can change the texture and potentially affect the vitamin C’s stability.
Is this safe during pregnancy? Always check with your doctor before using any skincare products during pregnancy, even DIY ones.
The Bottom Line
Here’s what I want you to remember: making your own vitamin C serum at home gives you control, saves money, and can be an enjoyable part of your self-care routine.
But it’s not mandatory. You’re not somehow failing at natural beauty if you buy yours at the store.
The goal isn’t perfection. It’s finding what works for your skin, your budget, and your life right now. For me, that changes depending on the season. In summer when I’m more diligent about skincare, I make my own. In busy months, I buy it.
Both approaches have value.
If you decide to try making your own, start simple. Use the basic recipe with just vitamin C powder and water. See how your skin responds. Then adjust from there.
And remember—this is supposed to be empowering, not stressful. If you make a batch and it doesn’t work out, you’re out about $5 and 10 minutes. That’s a pretty low-risk experiment.
Ready to Try It?
And if you try making your own vitamin C serum, I’d love to hear how it goes. Email me your experience—the good, the bad, and the “I can’t believe I’m storing face serum next to my leftover lasagna.”
We’re all figuring this out together.
Disclaimer: This information is for educational purposes only and is not intended to diagnose, treat, cure, or prevent any disease. Always consult with your doctor or dermatologist before starting any new skincare routine, especially if you have sensitive skin, existing skin conditions, are pregnant, or are using prescription skincare products. Individual results may vary. If you experience any adverse reactions, discontinue use immediately and consult a healthcare professional.
Last updated: October 28, 2025, Written by Claudia Faucher, Certified Personal Trainer with 15+ years of experience in health and beauty for women over 50

Claudia Faucher is a fitness and lifestyle blogger who shares practical tips for women over 50 on staying active, stylish, and confident. As the creator of FitFab50.com and Beyond59.com, she covers topics like workout gear, beauty trends, and wellness routines. Claudia is passionate about helping others live their best life at any age.
Last update on 2026-06-26 / Affiliate links / Images from Amazon Product Advertising API